Overview
This guide will walk you through setting up a Wireguard VPN server on a Digital Ocean VPS. This guide assumes you have a basic understanding of Docker and Linux.
Digital Ocean
Digital Ocean provides a simple way to create a virtual private server (droplet) that can be used for a variety of purposes. I have used Digital Ocean to host a Wireguard VPN server for a class project.
New accounts on Digital Ocean are given $200 in credit for 60 days. This is more than enough to run a droplet for a few weeks. Visit https://www.digitalocean.com/referral-program and click “Get Started” (Located on the bottom half of the page) to create an account.
Alternatively, you can use my referral link to create an account and receive the same $200 in credit, and I will receive a small credit as well.
Creating a Droplet
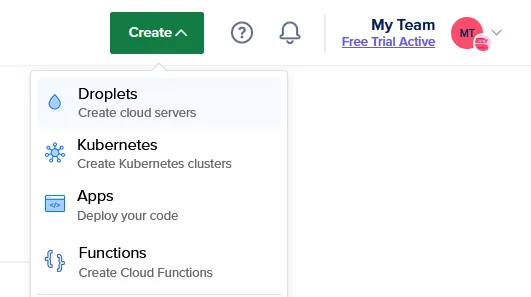
Once you have created an account, and logged in, click “Create” in the top right corner of the page. Select “Droplets” from the dropdown menu.
Select the datacenter location and droplet size. I have selected the Basic plan with 4GB of RAM and 2 vCPUs. This is much more than enough for a Wireguard VPN server, you can select a smaller droplet if you wish.
SSH Key Authentication
It is highly recommended to setup SSH key authentication for your droplet. This will allow you to login to your droplet without a password and is much more secure.
To setup SSH key authentication, click “New SSH Key” and paste your public key into the text box. If you do not have an SSH key, you can generate one with the following command:
ssh-keygen -t ed25519This will generate a new SSH key pair in the .ssh directory of your home directory. The public key will be located in .ssh/id_ed25519.pub. Copy the contents of this file and paste it into the text box on the Digital Ocean website.
Additional Options
You can add additional options to your droplet if you wish. I have changed the hostname as well as enabled monitoring and metrics. If you plan to use this over a more long term period, you may want to enable backups.
Initial Setup
Prior to installing Docker, you should update the droplet. This can be done with the following commands:
sudo apt update && sudo apt upgrade -yNote (System Update)
When prompted, make sure to use the local version of any configuration files that have been modified for SSHd.
You will likely need to restart after the updates complete. You can do this with the following command:
sudo rebootInstalling Docker
These steps are taken directly from Docker’s documentation.
Remove old/conflicting packages
for pkg in docker.io docker-doc docker-compose docker-compose-v2 podman-docker containerd runc; do sudo apt-get remove $pkg; doneAdd Docker’s repository to the machine
sudo apt-get updatesudo apt-get install ca-certificates curl gnupgsudo install -m 0755 -d /etc/apt/keyringscurl -fsSL https://download.docker.com/linux/ubuntu/gpg | sudo gpg --dearmor -o /etc/apt/keyrings/docker.gpgsudo chmod a+r /etc/apt/keyrings/docker.gpgecho \ "deb [arch="$(dpkg --print-architecture)" signed-by=/etc/apt/keyrings/docker.gpg] https://download.docker.com/linux/ubuntu \ "$(. /etc/os-release && echo "$VERSION_CODENAME")" stable" | \ sudo tee /etc/apt/sources.list.d/docker.list > /dev/nullsudo apt-get updateInstall docker packages
sudo apt-get install docker-ce docker-ce-cli containerd.io docker-buildx-plugin docker-compose-pluginVerify successful install
sudo docker run hello-worldWireguard
To run wireguard in docker, we will use the linuxserver/wireguard image. This image is based on Alpine Linux and has everything we need to run a Wireguard VPN server pre-installed.
Docker Compose
mkdir wireguard && cd wireguardTo make the process of running this docker image easier, we will use docker-compose. Create a file called docker-compose.yml with the following contents:
services: wireguard: container_name: wireguard image: linuxserver/wireguard environment: - PUID=1000 - PGID=1000 - TZ=America/North_Dakota/Center # Change this to your timezone - SERVERURL=1.2.3.4 # Change this to your server's IP address - SERVERPORT=51820 - PEERS=desktop,phone # Change these to the names you want to give your peers - PEERDNS=auto - INTERNAL_SUBNET=10.0.0.0 ports: - 80:51820/udp # This was changed from 51820:51820/udp to avoid common blocks on residential internet connections. volumes: - ./config:/config - /lib/modules:/lib/modules restart: always cap_add: - NET_ADMIN - SYS_MODULE sysctls: - net.ipv4.conf.all.src_valid_mark=1To start the container cd into the wireguard directory and run the following command:
sudo docker compose up -dConnecting to the VPN
Run the following command to view the logs:
sudo docker compose logs -f wireguardYou will see a QR code and a path to the configuration file. You can use the QR code to easily add the VPN to your phone. The configuration file can be used to add the VPN to your desktop.
Important
Since we changed the port mapping in the docker compose file, you will need to change the endpoint port in the configuration file to 80 as the config file will still have the default port of 51820.
Copy the config file to your desktop with the following command on your local machine:
sudo scp root@<ip>:/root/wireguard/config/peer_<peer_name>/peer_<peer_name>.conf .# Replace <ip> with your server's IP address and <peer_name> with the name specified in your docker compose file.You can now use this config file to add the VPN to your desktop.
Demonstration
- Desktop
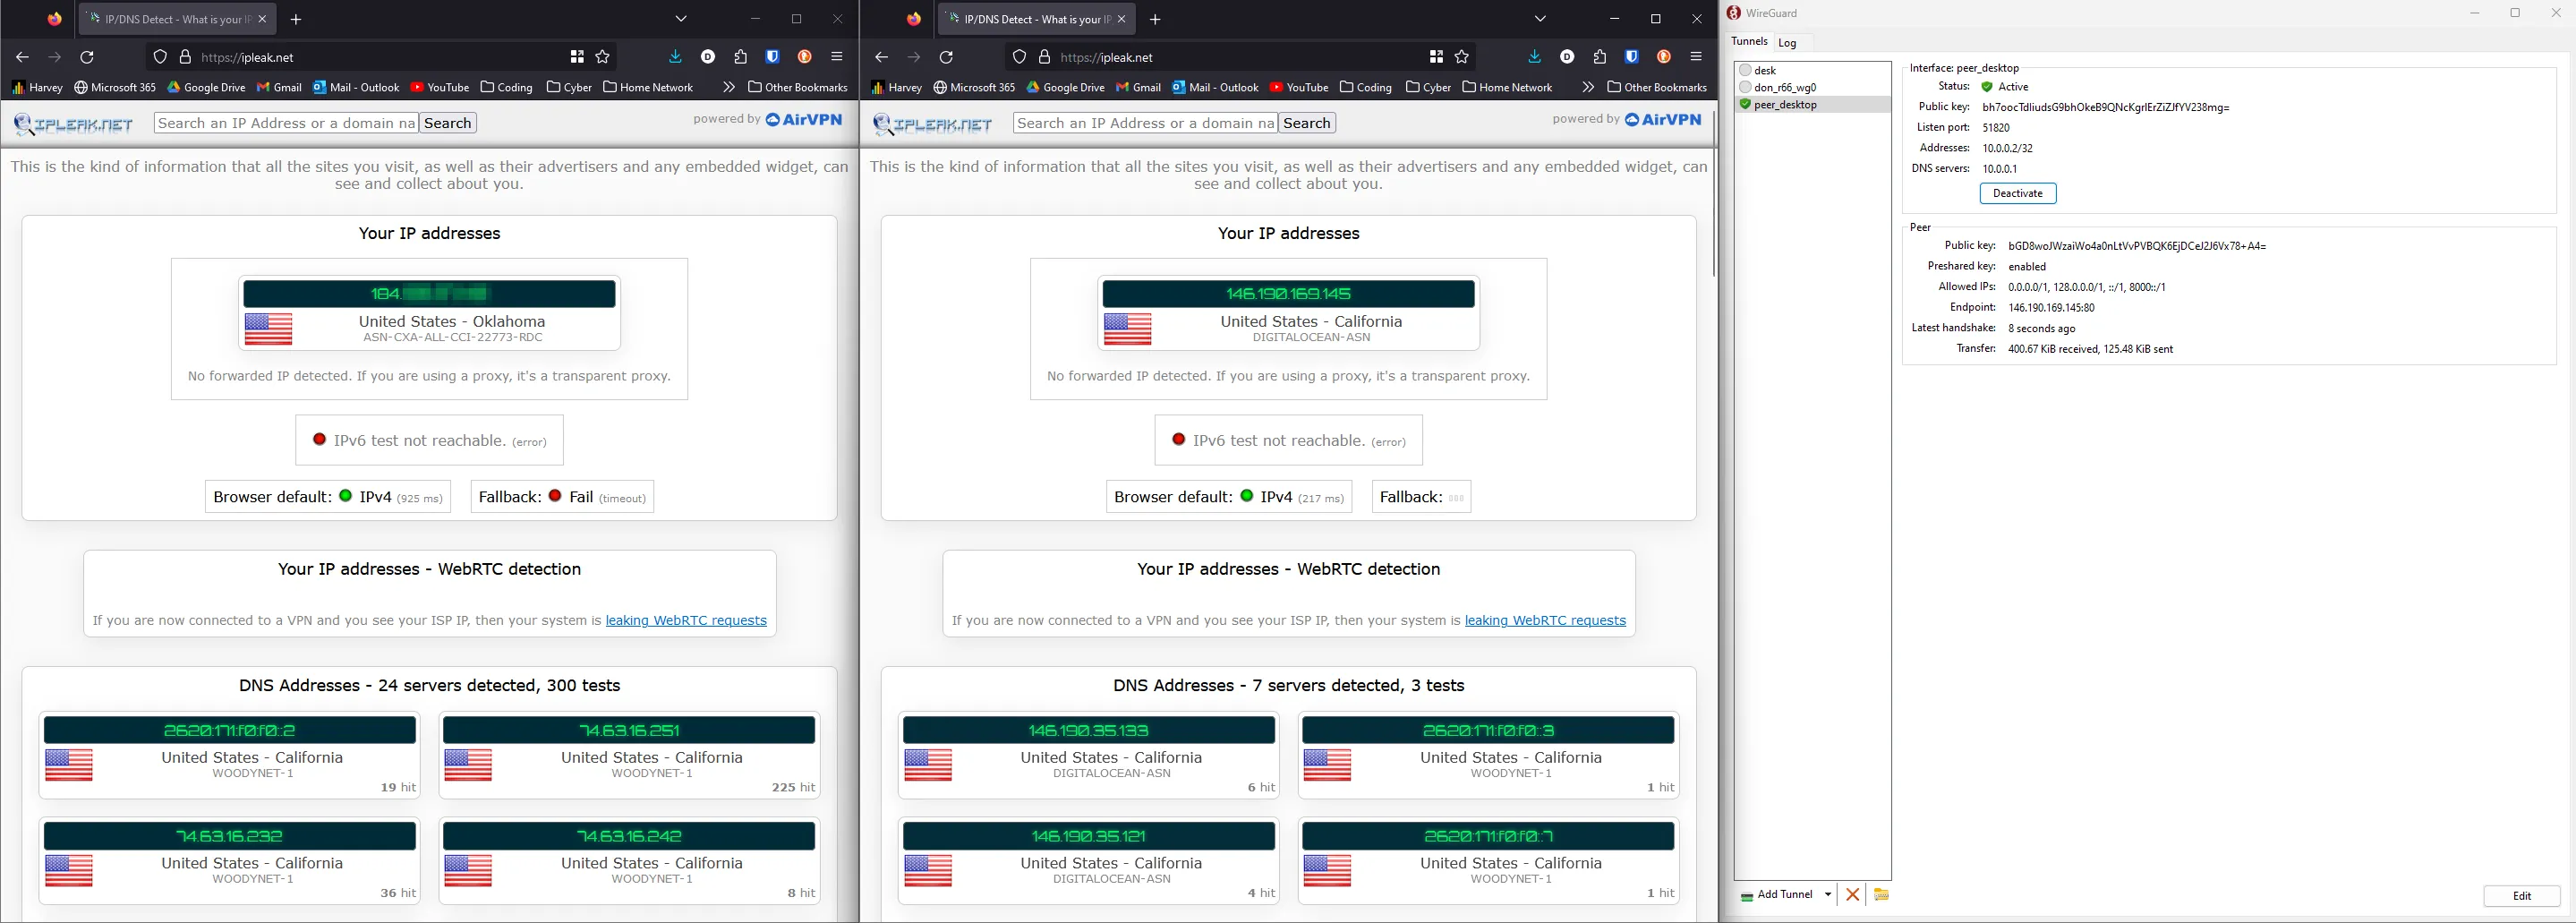
The browser on the left has not been refreshed since the vpn was connected, and the browser on the right has.
- Mobile Phone
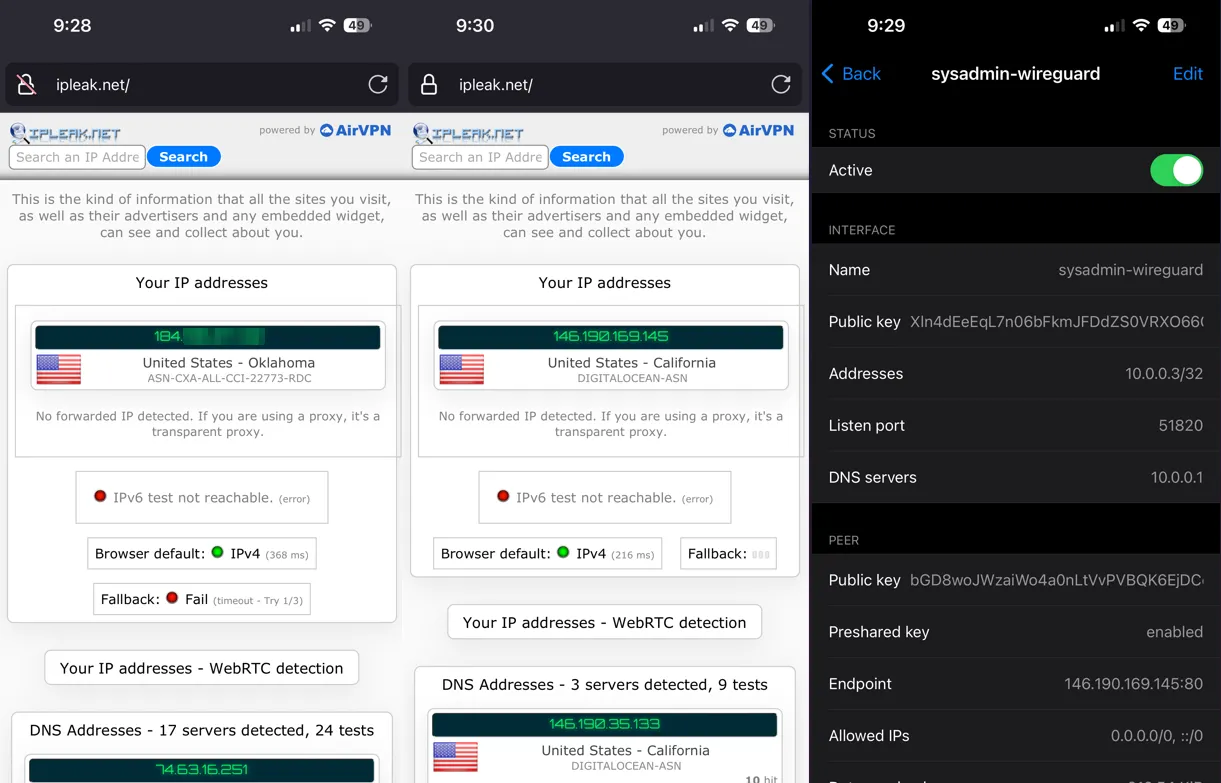
Note: This server will be shutdown prior to publishing this post.